A beacon management tool
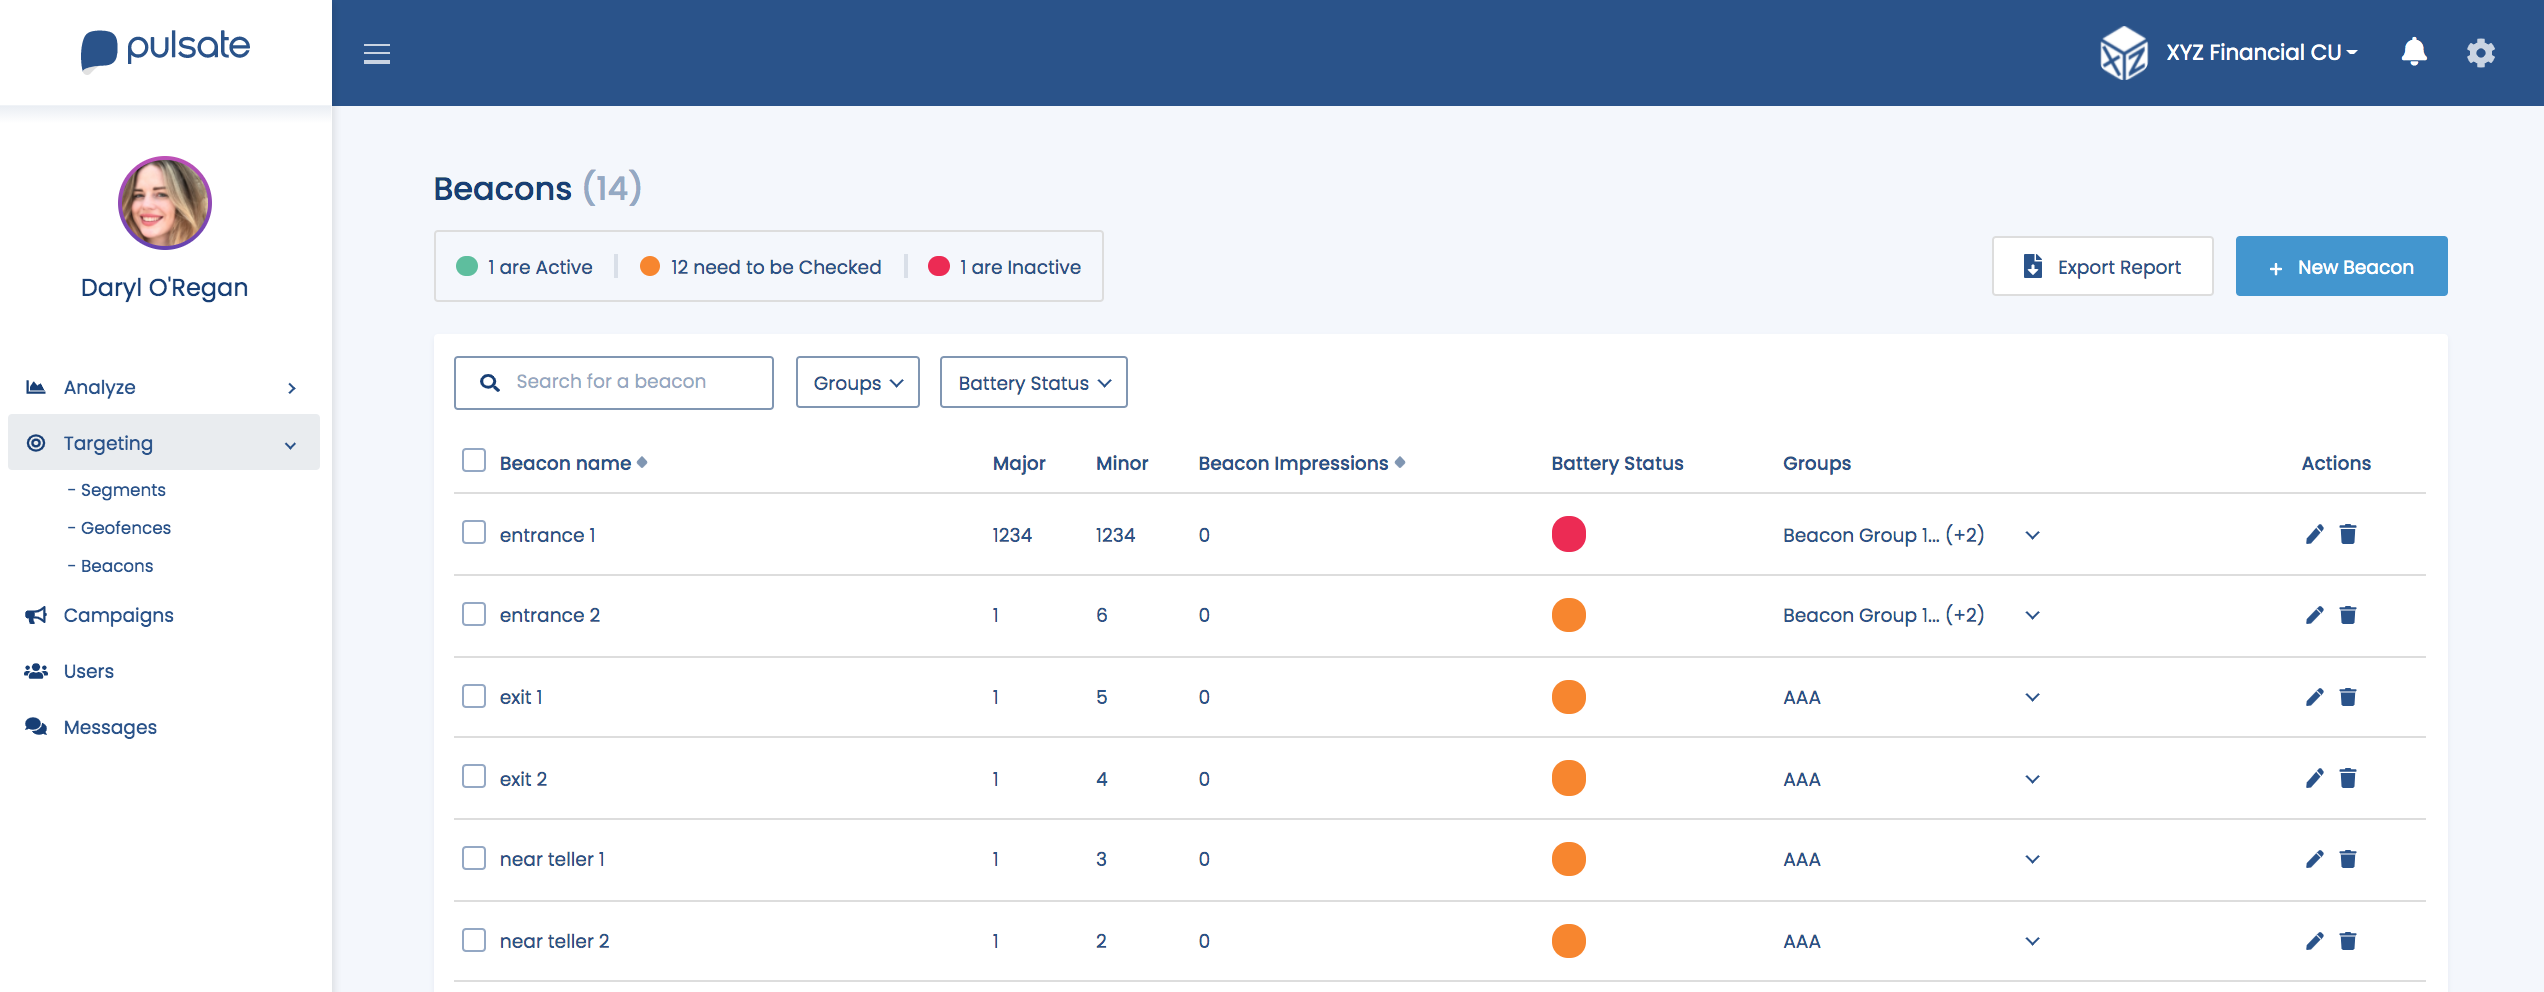
What is a beacon?
A beacon is a simple device that transmits a Bluetooth signal. The Bluetooth signal typically includes the following data:
Major
Minor
*UUID
Mobile devices can monitor for beacons, and this allows us to track various metrics, including customer footfall and visit frequency. Users within a beacon zone can also be sent individually targeted marketing communications based on their location. These are much more granular than geofences which can only send content to users when they are within 100m of a location.
Beacons, on the other hand, can target users within a couple of metres or less of a specified location.
What type of beacons does Pulsate support?
iBeacon is the most stable and widely used beacon protocol and it is fully compatible with both iOS and Android devices. Pulsate is compatible with and supports all beacons that follow iBeacon protocol.
Please note!
Some manufactures sell beacons with the software. No additional software required to work Beacons on Pulsate.
Adding a beacon to your Pulsate account using CSV file
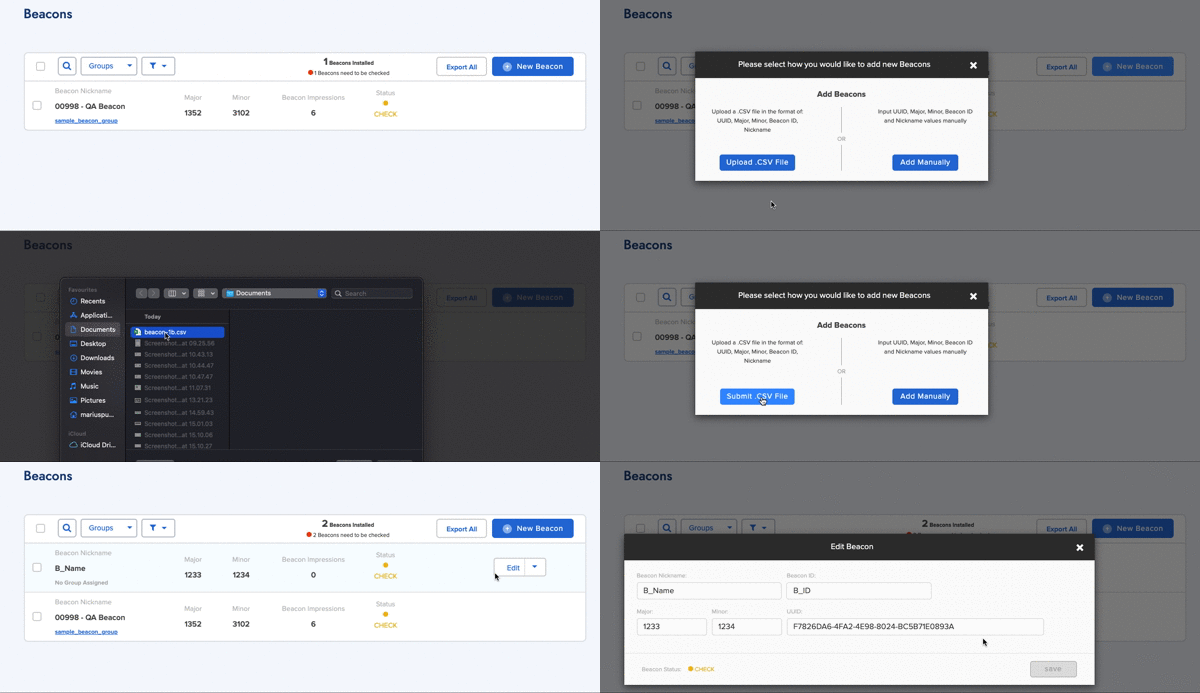
To add a beacon to your Pulsate account click the ‘Add Beacon’ button. This gives you the option to upload a.CSV file or add a beacon manually. Click 'Upload .CSV File'. The file should include the Beacon ID, Nickname, Major, Minor and UUID. Select a file and upload it.
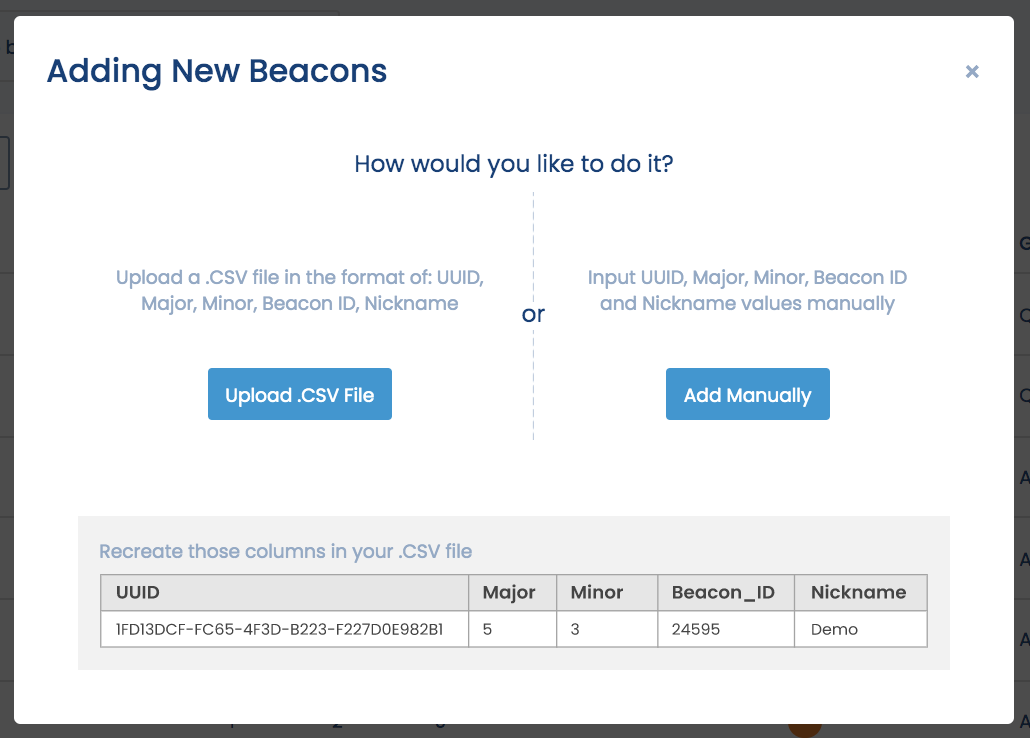
CSV file format
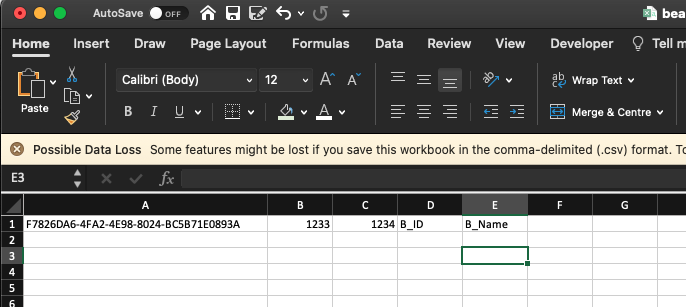
Upload Beacons via CSV file
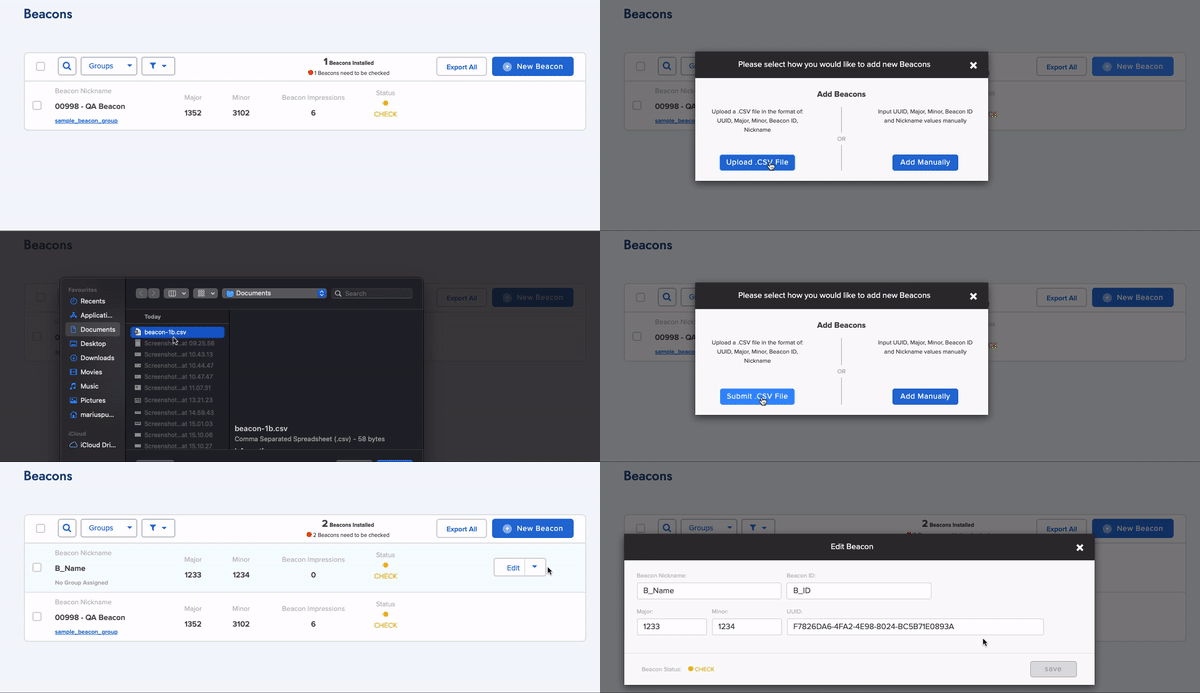
Adding beacons manually:
Click 'Add Manually' and fill out the following fields for each beacon:
| Parameter Name | Description |
|---|---|
| Beacon Nickname | A custom Pulsate identifier for each beacon that is typically the location of the beacon |
| Beacon ID | A custom Pulsate identifier for each beacon that is typically a unique identifier for the beacon added by Pulsate clients |
| Major | A custom identifier that is typically used to determine the macro-location of the beacon (ie which store in a retail use case) |
| Minor | A custom identifier that is typically used to determine the micro-location of the beacon (ie where the beacon is located within the store for a retail use case) |
| UUID | A unique identifier for each beacon, provided by the manufacturer. |
When all of the fields have been filled in, click 'Save' to add the beacon to Pulsate.
UUID - has to be UPPERCASE
How to edit a beacon?
Hover over the edit button of the beacon you wish to edit and from the drop-down menu select 'Edit Beacon’. A new modal window will open with the current parameters. Edit and save.
How to delete a beacon?
To delete multiple beacons, click all checkboxes on the left-hand side of the beacons you wish to delete. The dotted button will appear in the navigation bar, click on it. From the drop-dow menu select 'Delete beacons'. You will be asked to confirm if you would still like to remove them. If so, choose 'Delete'. If not click 'Cancel'. All selected beacons will be deleted.
To delete single beacon, hover over the beacon with the mouse. An 'Edit' drop-down button will appear.
Select 'Delete'. A confirmation window will appear and you will be asked to confirm if you would still like to remove it. If so, choose 'Delete'. If not click 'Cancel'.
Check the status
Sometimes beacons run out of battery or need to be replaced for a host of reasons. To help identify when a beacon might need to be checked, Pulsate operates a traffic light system. If Pulsate has received an event for the beacon within the last week, a green traffic light symbol will be visible for that beacon. If no event has been received for a beacon within the last two weeks, that symbol will be changed to amber and if no event has been recorded for a beacon for over two weeks the traffic light symbol will change to red.
It is good to keep an eye on the status of individual beacons and to proactively check any beacons that have an amber or red traffic light symbol.

Exporting beacon data
Pulsate has a number of different methods for exporting beacon data to help you measure footfall and visitor frequency. To export beacon data from the Pulsate CMS, go to the beacon section and click 'Export All'
You will be prompted to choose a timeframe for the beacon export (the default period is 1 month), then select 'Export'. Pulsate will compile the necessary data and send an email to the admin who is currently logged in with a csv attachment that includes all of the beacon events for the time period that was specified.
In addition, Pulsate can also automatically send any recorded beacon events to a URL of your choice via webhook. When a 'Beacon enter' or 'Beacon exit' event has been recorded by Pulsate, it will be automatically sent to the specified webhook. To enable this feature, click 'Settings', then 'App Settings' in Pulsate and scroll down to the Webhooks section.
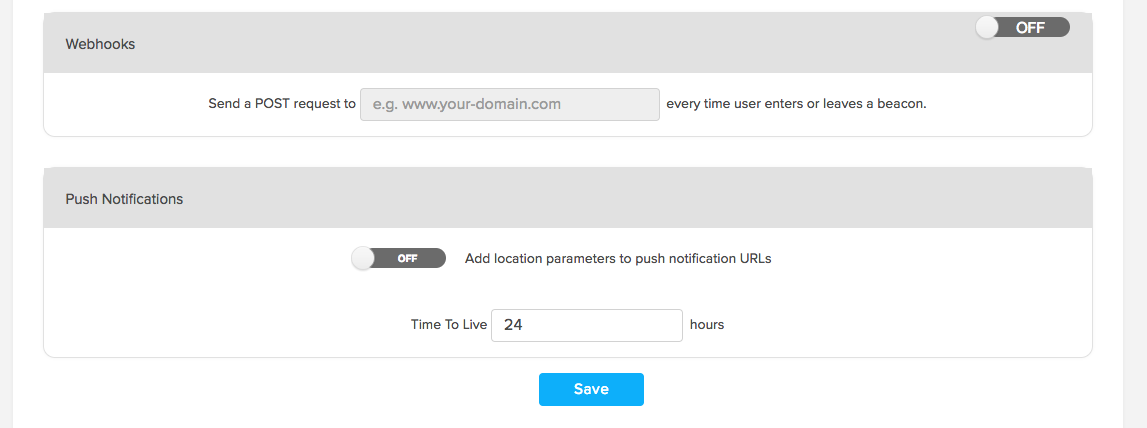
Switch the toggle to ON and then enter a URL where you would like Pulsate to send beacon events.
Then scroll down to the bottom of the App Settings page and press Save.
Beacon Impressions
Each time a user's phone detects the beacon it is counted as one beacon impression.
If a campaign is set to trigger on that impression, the campaign will send however an impression may not trigger a campaign if no campaign is setup for that beacon.
The beacon impression totals is a count of all devices which were detected by that beacon over time. If a users device exits the beacon and enters again, this will be recorded as another beacon impression.
